 GitHub自动部署脚本
本篇博客的目的是:编写shell脚本将本地的博客自动化的部署到github仓库。
为了看懂下面的代码,需要知道:
- shell的基本语法。
- git知识点。
# 00.deploy.sh
#!/bin/sh
# 确保脚本抛出遇到的错误
set -e

# 生成静态文件
npm run build

# 进入生成的文件夹
cd ./docs/.vuepress/dist

GITHUB_TOKEN="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"

# deploy to github
if [ -z "$GITHUB_TOKEN" ]; then
    msg='deploy'
    githubUrl=git@github.com:wangjs-jacky/vblog.git
else
    msg='来自github actions的自动部署'
    githubUrl="https://wangjs-jacky:${GITHUB_TOKEN}@github.com/wangjs-jacky/vblog.git"
    git config --global user.name "wangjs-jacky"
    git config --global user.email "2409277719@qq.com"
fi
git init
git add -A
git commit -m "${msg}"
git push -f $githubUrl main:gh-pages # 推送到github


cd - # 退回开始所在目录
rm -rf docs/.vuepress/dist
2
3
4
5
6
7
8
9
10
11
12
13
14
15
16
17
18
19
20
21
22
23
24
25
26
27
28
29
30
# 01.SHELL相关知识点
# #!的含义:
第一行的#!符号的名称,叫做”Shebang“或者”Sha-bang”。长期以来,Shebang都没有正式的中文名称。Linux中国翻译组的GOLinux将其翻译为“释伴”,即“解释伴随行”的简称,同时又是Shebang的音译。本文将简单介绍一下Shebang这个符号。
# 用法:
Shebang通常出现在类Unix系统的脚本中第一行,作为前两个字符。在Shebang之后,可以有一个或数个空白字符,后接解释器的绝对路径,用于指明执行这个脚本文件的解释器。
Linux 的 Shell 种类众多,常见的有:
- Bourne Shell
(/usr/bin/sh或/bin/sh) - Bourne Again Shell
(/bin/bash) - C Shell
(/usr/bin/csh) - K Shell
(/usr/bin/ksh) - Shell for Root
(/sbin/sh)
由于windows和mac中shell解释器的绝对路径是不同:
windows:#!/user/bin/shMac:\#!/bin/sh
如果脚本文件中没有
#!这一行,那么执行时会默认采用当前Shell去解释这个脚本(即:$SHELL环境变量)。如果#!指定的解释程序不存在,那么会报错 “bad interpreter: No such file or directory”。
当然,如果你使用类似于
”bash test.sh”这样的命令来执行脚本,那么#!这一行将会被忽略掉,解释器当然是用命令行中显式指定的bash。
# 如何运行shell脚本?
在windows系统,shell脚本是可执行的。在mac系统中,需要执行chomd +x ./test.sh
注意:一定要写成 ./test.sh,而不是 test.sh,linux 系统会去 PATH 里寻找有没有叫 test.sh 的,而只有 /bin, /sbin, /usr/bin,/usr/sbin 等在 PATH 里,你的当前目录通常不在 PATH 里,所以写成 test.sh 是会找不到命令的,要用 ./test.sh 告诉系统说,就在当前目录找。
# shell基本语法
# 变量定义
variable_name="runoob.com" #注意:=号前后不能有空格。

# 打印变量
echo $variable_name
echo ${variable_name}

# 删除变量
unset variable_name

# 条件
if condition
then
    command1
    command2
    ...
    commandN
fi
# 用;可以将上面的代码写成一行
if [ condition ];then comaand1; fi
2
3
4
5
6
7
8
9
10
11
12
13
14
15
16
17
18
19
20
# 02.github
# Token申请与使用
自2021年8月13日开始,原先使用密码git push的方式被禁止了,所以我们可以使用token来取代password来git push代码。
目前github支持三种认证方式:
SSH(在《git教程》这篇文章中已经阐述过了)HTTPS(登录时需要设置账号和密码)Access Token(本篇blog补充)
使用Access Token的方式有两步:
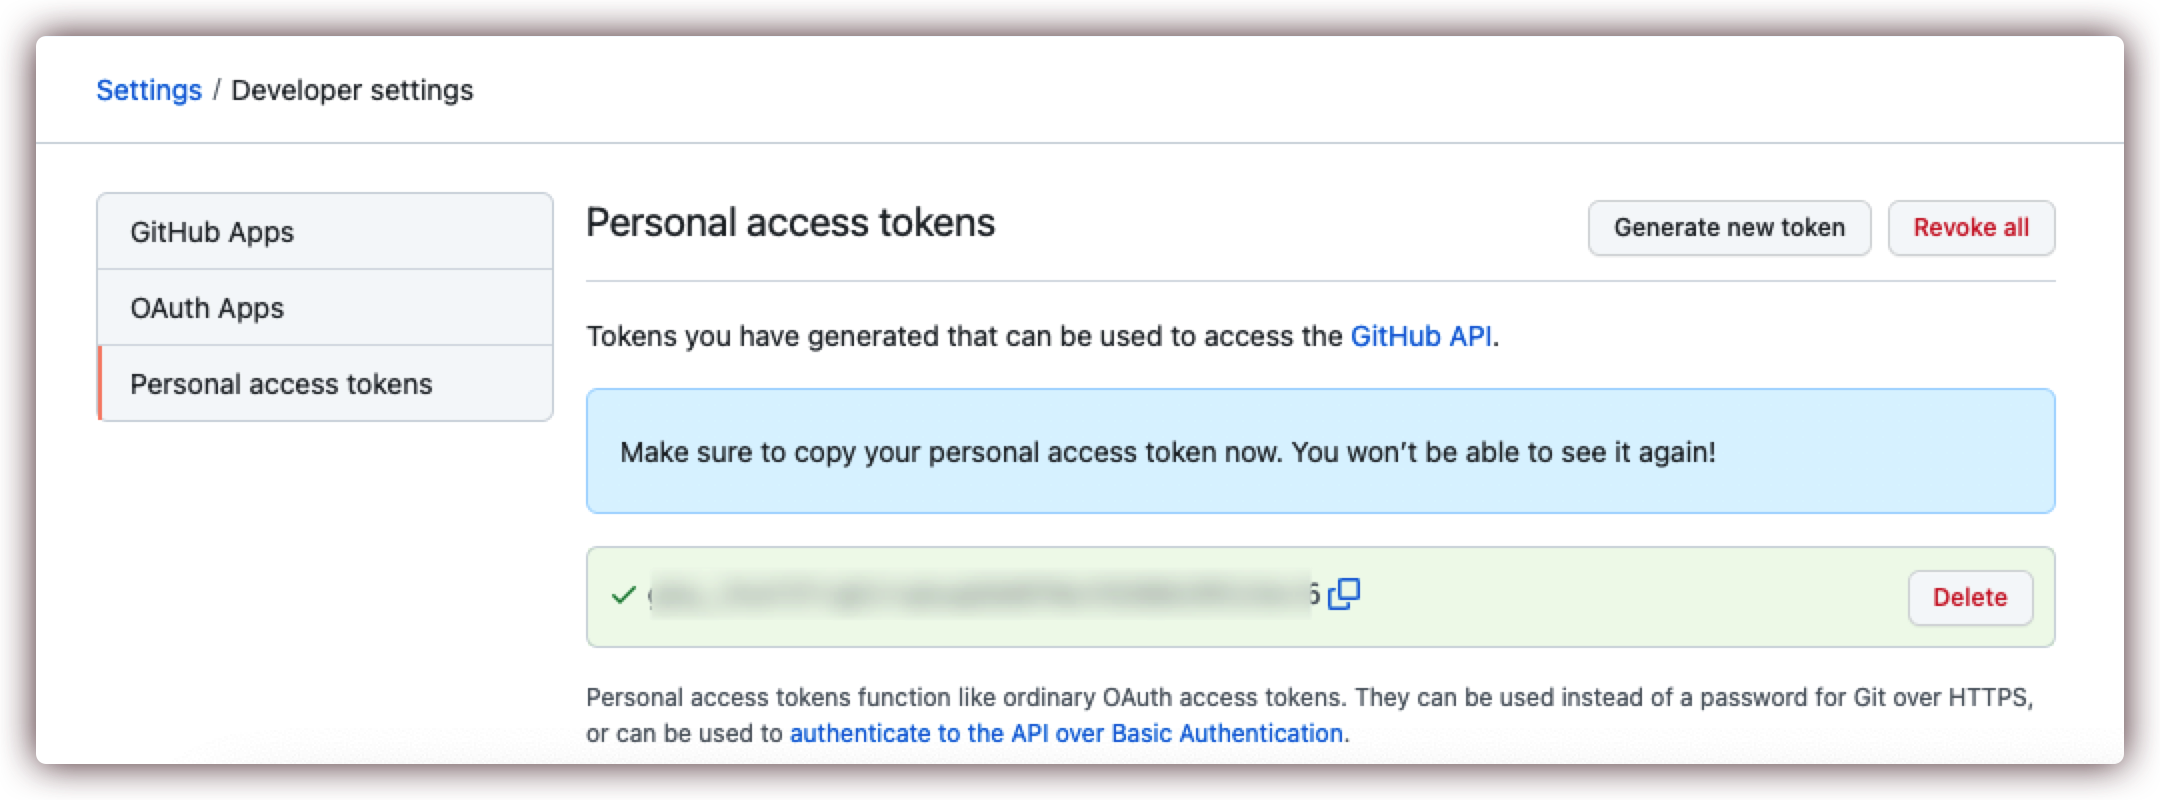
步骤一:个人头像->Setttings->Developer settings->Personal access tokens->Generate new token 登录github后点这里进入。
对应的教程:博客:如何生成GitHub的Token (opens new window)
申请成功后:

步骤2:修改
urlurl="https://wangjs-jacky:${GITHUB_TOKEN}@github.com/wangjs-jacky/vblog.git"1
# github的配置方式
配置github方式有两种:
- 通过修改配置文件
.git/config的方式修改服务的配置。 - 通过命令行的方式:
git condig -l
配置文件的作用范围有两种:全局设置和局部设置
全局配置文件:
~/.gitconfig本地配置文件:在本地的项目结构下的
.git/configmac系统中使用
command+shift+.可以在finder中显示。也可通过命令行的方式:
ls -a
# 03.常见问题
在提交操作的时候,当执行git push -f $githubUrl main:gh-pages # 推送到github这行代码的时候,报错:
error: src refspec main does not match any
error: failed to push some refs to 'https://github.com/wangjs-jacky/vblog.git'
2
错误产生的原因:
受"Black Lives Matter"运动的影响,GItHub从10月1日期,该平台上所有新的源代码仓库名从原先的master该为main。
博客刚创建的时候,本地的分支名为:master:gh-pages,如果改为main:gh-pages就会找不到本地的分支。提示src refspec main找不到。
对此,有两种解决方案:
改回原先的本地
local repo名称git push origin master:gh-pages1重命名本地分支的名称
git branch -m oldBranchName newBranchName1也就是:
git branch -m master main1
SSH命名配置,还是提示没有权限,原因是没有将秘钥的位置告诉系统
解决方案:stackoverflow-ssh -T git@github.com Permission denied (publickey) (opens new window)
ssh-add -l # 如果提示 no identities ,说明就是ssh没有添加到路径

# 解决:
ssh-add
2
3
4
# 进一步可以完善的内容
gitconfig文件中各配置的意义。
