 高阶组件基础
# 0. 前言
本篇博客主要就是讲解 React 高阶组件 - HOC。
不会讲故事,就直接开始讲解 HOC 的梳理工作。
本篇博客的项目演示地址:https://wangjs-jacky.github.io/jacky-workspace-html/react18/hoc (opens new window)
# 1. 什么是高阶组件?
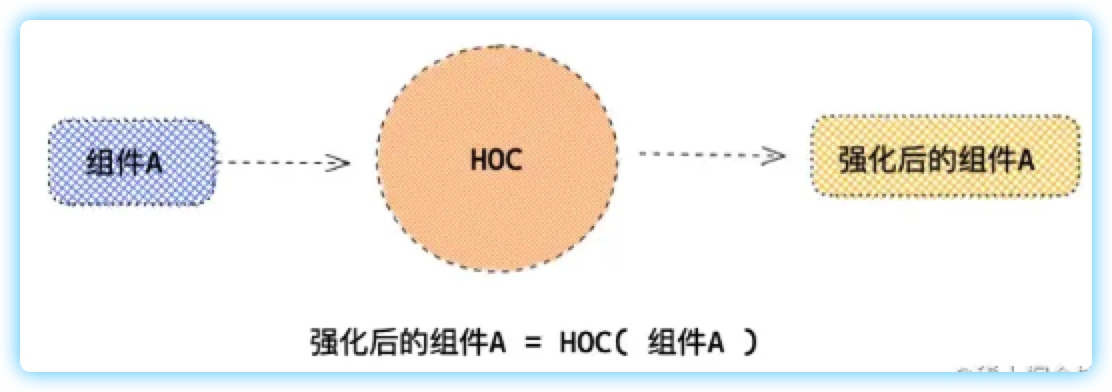
高阶组件HOC ,英文全称为 Heigher Order Component ,用下面一张图就可以阐述清楚

由上图可知,高阶组件就是入参出参皆为 Component 。
# 2. 怎么写 HOC ?
高阶组件虽然简单,但是由于在 React 框架中存在两种类型的组件,即Class Component 以及 Function Component ,因此在实现层面上有多种写法。
# 入参组件的 Typescript
在封装 HOC 的入参,难点在于 Typescript 的定义,由于不知道接受的是 Class Component 还是 Function Component ,所以需要一个联合类型去涵盖这两个情况,在 React 已经内置这个类型 ComponentType<P> 。
type ComponentType<P = {}> = ComponentClass<P> | FunctionComponent<P>;
举例如下:
const WithComponent = (Component) => {
  return (props): JSX.Element => {
    return (
      <div>
        <header>this is header</header>
        <Component {...props} />
      </div>
    );
  };
};
2
3
4
5
6
7
8
9
10
在上述代码中,我们需要补全两个部分的 ts 类型定义。
- 其一、是入参
Compnent的类型。 - 其二、是
props的类型。
/* type ComponentType<P = {}> = ComponentClass<P> | FunctionComponent<P>; */
const CreateWithComponent = (title: string) => {
  /* 返回一个 HOC(即,入参组件,出参也是组件) */
  /* 难点:入参组件既有可能是一个 Class 也可能是 Function Component */
  return <P extends {}>(Component: React.ComponentType<P>) => {
    return (props: P): JSX.Element => {
      return (
        <div style={{ border: '1px solid #000' }}>
          <h2>接受的参数是:{title}</h2>
          <Component {...props} />
        </div>
      );
    };
  };
};
2
3
4
5
6
7
8
9
10
11
12
13
14
15
16
在定义返回的组件类型时,就需要确定组件接受需要的 props 的类型,因为这部分的参数类型需要等到 props 传递时才能确定,因此在定义的时候应预留出 泛型坑位。
整个函数接受入参的逻辑为:(title)=>(Component<P>)=>(props:P)=>JSX.Element
# 出参组件分情况讨论
同上,出参情况也分 Class Component 还是 Function Component 。
# 情况一:Function Component
通过一个简单案例来了解具体写法,下面这个 HOC 可添加一个标题。
步骤如下:
构造
CreateWithComponent,依次接受两个参数。结构:
(title)=>(Component)=>Function Component,其中Component=>Function Component为HOC。const CreateWithComponent = (title: string) => { return <P extends {}>(Component: React.ComponentType<P>) => { return (props: P): JSX.Element => { return ( <div style={{ border: '1px solid #000' }}> <h2>接受的参数是:{title}</h2> /* HOC 功能:属性继承 */ <Component {...props} /> </div> ); }; }; };1
2
3
4
5
6
7
8
9
10
11
12
13使用
CreateWithComponent创造具有一个相同title的HOCconst WithComponent = CreateWithComponent('child1');1使用
HOC生成可供消费组件const Wrapper = WithComponent(ComponentA);1将
Function Componet渲染到页面。有两种渲染方式,见下:
const Main = () => {
  /* 此组件可以传递参数 */
  return (
    <>
      <Wrapper attr="使用方案1"></Wrapper>
      <br></br>
      {WithComponent(ComponentA)({ attr: '使用方案2' })}
    </>
  );
};
export default Main;
1
2
3
4
5
6
7
8
9
10
11
# 情况二:Class Component
当输出组件为类组件时,又存在两种继承方式。
继承自
React.Componentreturn class WithComponent extends React.Component<P, {}> {}1【反向继承】当入参组件为
Class Component,可直接通过继承该组件实现HOCreturn class WithComponent extends Component{}1这种继承方式,也被称为 反向继承。
为了保持文章的逻辑性,此部分内容将另起一篇博客叙述,本篇设定接受的组件既有可能是
Class组件也可能是Function组件的情况。
第一种继承方式的 HOC 编写,步骤如下:
构造
CreateWithComponent,依次接受两个参数。结构:
(title)=>(Component)=>Class Component,其中Component=>Class Component为HOC。const CreateWithComponent = (title: string) => { return <P extends {}>(Component: React.ComponentType<P>) => { /* 继承自 React.Component */ return class WithComponent extends React.Component<P, {}> { render() { return ( <div style={{ border: '1px solid #000' }}> <h2>当前组件是:{title}</h2> <Component {...this.props} /> </div> ); } }; }; };1
2
3
4
5
6
7
8
9
10
11
12
13
14
15使用
CreateWrapper创造具有一个相同title的HOCconst WithComponent = CreateWithComponent('child2');1使用
HOC生成可供消费组件const Wrapper = CreateWithComponent(ComponentA);1将
Class Componet渲染到页面。同样有两种渲染方式,注意
ClassComponet 的渲染需要实例化后,调用render函数获取JSX.ELEMENTconst Main = () => { /* 此组件可以传递参数 */ const Element = new Wrapper({ attr: '使用方法2' }).render(); return ( <> <Wrapper attr="使用方案1"></Wrapper> <br></br> {Element} </> ); }; export default Main;1
2
3
4
5
6
7
8
9
10
11
12
# 3.命名规范
高阶组件的命名,推荐使用 With + 组件名称的写法,如 withFromTable,withRouter 等。
对于HOC 为匿名函数的情况,推荐使用: Create + With + 组件名称的写法,如 CreateWithFormTable,CreateWithRouter 等。
# 4.小结
本篇博客主要内容如下:
使用
React.ComponentTyp定义处理接受的组件既可以是类组件也可以是函数组件。当
HOC返回的是一个Function Component时。除了传统的
<Compoent />,还可以通过WithComponent(Component)(props)获取JSX.Element并渲染在页面上。当
HOC返回的是一个Class Component时。需要使用 反向继承 的方式对组件进行
Wrap包裹。并且也提供了两种渲染方式,除了传统的
<Compoent />,还可以通过构建实例对象,并调用render函数的方式获取JSX.Element并渲染在页面上。
